8 Simple Yoga Poses For Glowing Skin
1. Breathing exercise:
Control your breathing through counts that will rejuvenate your mind and that is what makes this pose of yoga for beautiful skin so popular.
[ #Yoga]
- Sit on the floor with legs crossed.
- Close your eyes, relax and breathe normally.
- Now breathe in deeply through both nostrils with the count of 10.
- Hold your breath, again by counting 10.
- Count another 10 to release the breath.
- Practice this breathing technique for 5-10 minutes.
This breathing exercise will help you control your mind and you won’t get stressed out easily.
2. Shirshasana (Headstand):
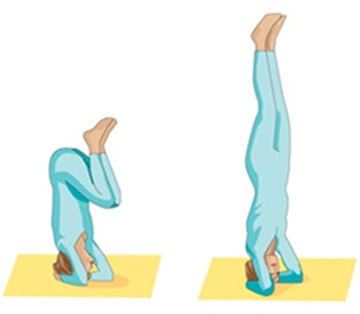
Shirshasana is a bit difficult pose but is great if you want to maintain a long-lasting glow and healthy look in your face. Since you are standing on your head, blood starts flowing downwards, thereby improving blood circulation in your face. By reversing the flow of gravity, a headstand simulates a “face lift” by letting your skin hang in the opposite direction, which means getting rid of wrinkles. The inverted position of a headstand also flushes fresh nutrients and oxygen to the face, creating a glowing effect on the skin.
- Place a yoga mat on the floor. Beginners may use a few stacks of blanket or anything that is a bit soft and will give proper support to your head.
- Sit on the floor in kneel-down position. Remember your teachers punishing you asking you to kneel down. Keep your spine straight and keep your hands on your knees. Take a few normal breaths and relax.
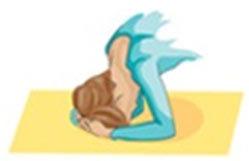
- Next bring your hands in front of you on the mat or blankets (whichever you may be using), elbows on the floor and interlock your palms. See above picture.
- Next position your head in between your interlocked palms. Refer to the above picture. Be careful not to hurt yourself. Take a few relaxing breaths before we move on to the next step.
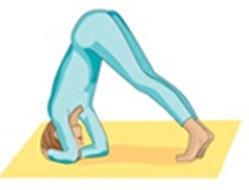
- Next try lifting up your body in a mountain position. Start with your knees, lift your hips and now you are supporting this position with your forearms, head and your toes. This is like a downward dog pose. See picture above. Balancing up till this position does take a lot of stamina, but with practice you will be able to do this. Balance yourself till this step and proceed again when you are totally comfortable with this pose.
- This step requires a bit more test of your balance. Now that you have partially balanced on your head, lifted up your hips and standing on your toes, try lifting up one leg off the floor slowly and steadily. To make it easier, walk your feet towards your head, unless your feet would naturally want to lift off.
- Now that you have lifted one leg, try lifting the other leg too. This will require a lot of strength on your arms and hand. But with practice, you’ll be able to master it. Beginners can ask friends to help them in balancing or you may also take support of the wall.
- To come down, bend your knees and curl down or bring down one leg and then the other as you had gone up.
- Relax in a kneel-down posture with some deep relaxing breaths.
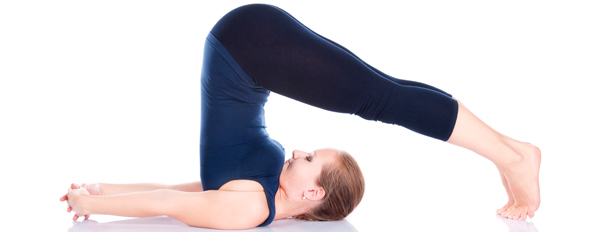
3. Halasana (Plough pose):
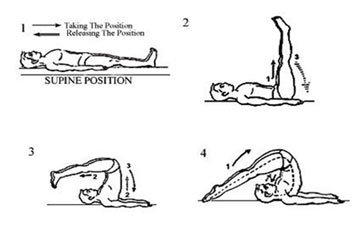
- Lie down on your yoga mat straight and relaxed. Put your arms by your side with palms facing the floor.
- Now slowly lift up your legs from the floor such that a right angle is formed between your upper and lower torso. Push floor with your hands so that it gets easy for you to lift your legs. Breathe and relax.
- Next bring your legs more towards your upper torso and slowly lift your hips off the floor supporting and balancing yourself with your hands.
- Continue lifting your legs and bring it beyond your head as much as possible so as to touch the floor beyond your head with your toes.
- At this point, lift your back further so that now only your shoulder and your head is resting on the floor.
- Now your back has formed an arch. Straighten your spine and support the two sides of your waist with your hands, elbows on the ground. Breathe normally.
- Hold posture for 15-30 seconds before returning back to normal position.
Refer to the below picture for a clear step by step understanding.
This is one of the wonderful yoga asanas for glowing skin!
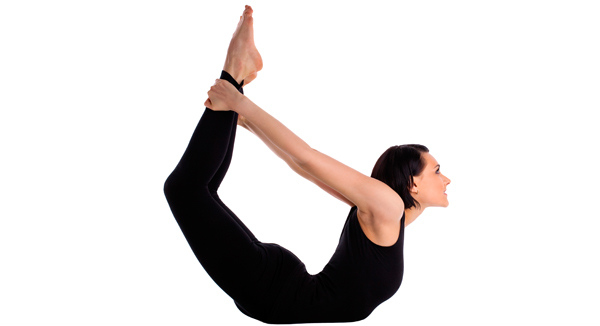
4. Dhanurasana (Bow pose):
In this asana, your body should pose like a bow.
- Lie down on your belly with hands by your side with palms facing upwards.
- Bend your knees to bring the heels near your buttocks.
- Now take your hands back and grasp your ankles. Rest your body weight on your abdomen.
- Now pull your ankles more with your hands. As your pull your ankles more, your upper torso automatically rises. And now your body looks like a bow.
- Keep your breathing normal.
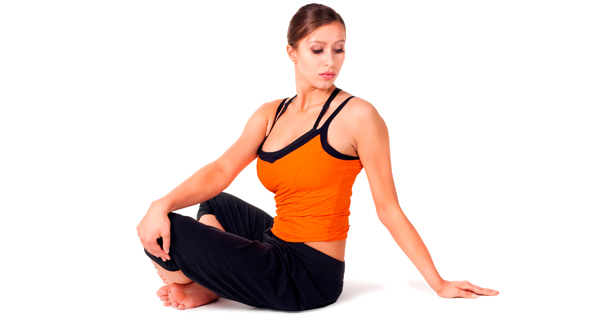
5. Bharadvajasana (Twisted seated pose):
- Sit on the mat cross-legged with both hands extended on the mat on both your sides.
- Inhale deeply and strengthen your spine.
- Shifting your left hand from the mat place it on your right thigh and twist your torso to the right. Exhale when you twist your body.
- Hold this position for 30 seconds.
- Now turn your torso to your left while placing your right hand over your left thigh. Stay for another 30 seconds.
This asana of yoga for
fair and glowing skin is great for anti-aging.
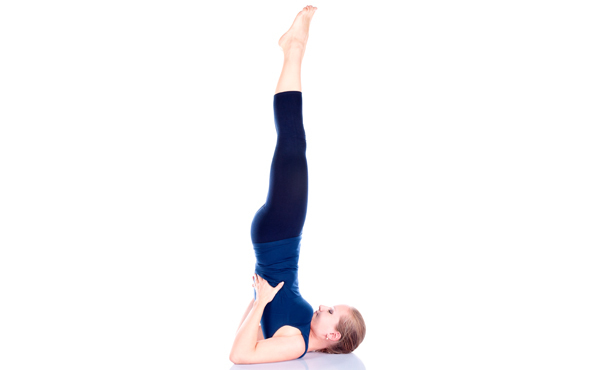
6. Sharvangasana (Shoulder stand):
This asana involves the whole body, hence the name Sharvanga.
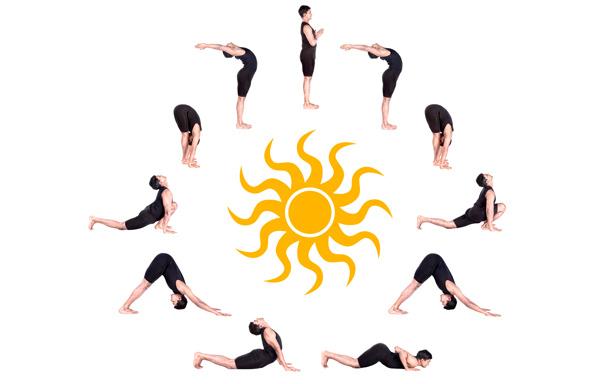
7. Surya Namaskar (Sun Salutation):
The mother of all yoga asanas. Surya Namaskar involves 12 postures. (Link back to surya namaskar)
This yoga poses de-stresses, removes toxins and is a great relaxation exercise. So you can obviously expect your skin to glow if you practice this regularly.
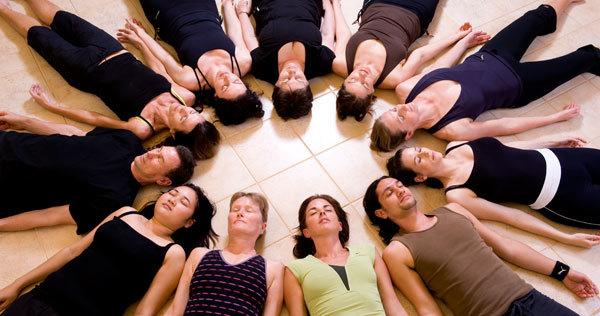
8. Shavasana (Corpse pose):
- Lie down straight on the floor with your eyes closed.
- Relax thoroughly and throw out all negative thoughts and tension, be it your office pressure or any disturbance in your family. Think good and positive.
- Now, stand up straight and firm with your legs apart. Cover your face with your hands and take 10 quick breaths.
- Rub the skin on your eyes, forehead and face. Again take 10 quick breaths. Then rub entire face with your fingers. Breathe properly at the count of 10.
[ Yoga ]
You’ll feel all your stress and tensions have disappeared. Technically Shavasana should be practiced after having done all yoga asanas. It is like a concluding asana for your yoga session. The time of Shavasana should be 15-20 minute
Practice yoga, be happy and feel beautiful.
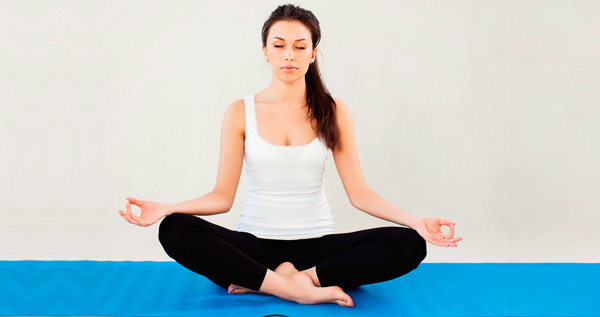 Control your breathing through counts that will rejuvenate your mind and that is what makes this pose of yoga for beautiful skin so popular.
[ #Yoga]
This breathing exercise will help you control your mind and you won’t get stressed out easily.

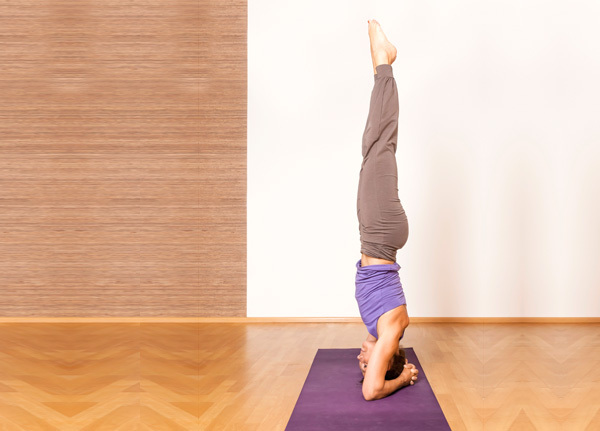 Shirshasana is a bit difficult pose but is great if you want to maintain a long-lasting glow and healthy look in your face. Since you are standing on your head, blood starts flowing downwards, thereby improving blood circulation in your face. By reversing the flow of gravity, a headstand simulates a “face lift” by letting your skin hang in the opposite direction, which means getting rid of wrinkles. The inverted position of a headstand also flushes fresh nutrients and oxygen to the face, creating a glowing effect on the skin.
[ Yoga Benefits ]




No comments:
Post a Comment